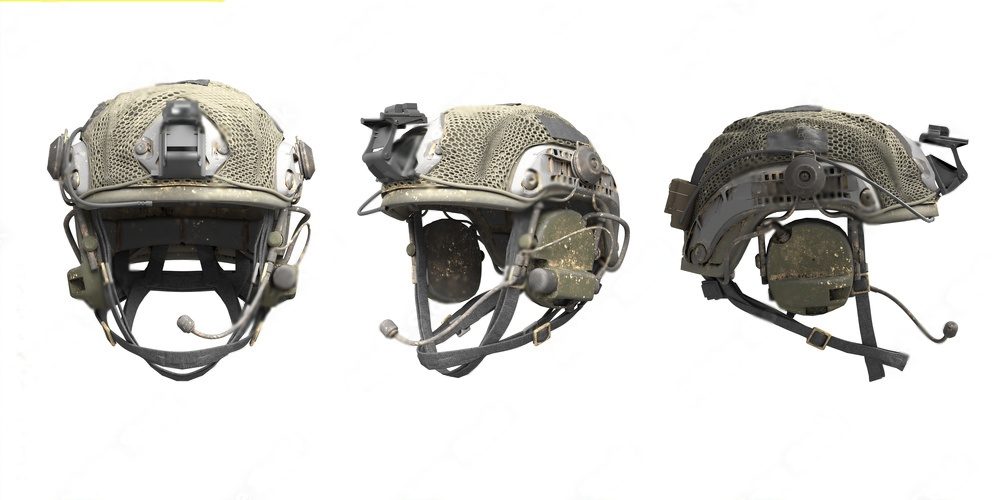
You’re gearing up for a mission, and your ballistic helmet isn’t just about protection—it’s your mobile command center. Choosing the right communication devices and camera attachments is crucial..
You’ll learn to mount gear securely and streamline your helmet’s capabilities. With our guide, you’ll integrate systems seamlessly, maintain peak performance, and troubleshoot with ease.
Get ready to elevate your tactical readiness with precision-rigged helmet tech that keeps you connected and aware, every step of the way.
→ Would like to discover more? Take a look at other articles by Steele Industry!
–https://steeleindustries.com/what-you-need-to-know-about-thermal-imaging/
–https://steeleindustries.com/a-novel-view-the-pvs-14-monocular-explained/
–https://steeleindustries.com/the-power-of-panorama-an-examination-of-the-gpnvg-18/
–https://steeleindustries.com/into-the-night-a-guide-to-the-mawl-da-laser-system/
– For more reading, visit our blog!
Contact:
-Call us at (800) 674-7302
-E-mail: [email protected]
–Facebook/ steeleindustriesinc
–Instagram/steeleindustriesinc
Key Takeaways
- Ballistic helmet platforms and attachment systems serve as the foundation for mounting communication and camera equipment, offering customization and adaptability.
- When choosing communication and camera devices, assess compatibility, consider device weight and its impact on balance and comfort, and evaluate mounting systems and available real estate on the helmet.
- Carefully manage device weight and integration to maintain agility and endurance, ensuring secure attachment methods and minimal equipment interference.
- For installing and maintaining communication and camera systems, use compatible mounting systems, align and adjust the mount to the helmet’s curvature, conduct regular inspections, and clean device surfaces to ensure reliable equipment performance.
Understanding Ballistic Helmet Platforms
Within the realm of tactical operations, ballistic helmet platforms serve as the foundation for mounting essential communication and camera equipment.
These platforms are engineered to integrate seamlessly with headgear, ensuring that devices such as night vision goggles, tactical cameras, and communication headsets are securely affixed and strategically positioned.
You’ll appreciate that the modular design allows for swift customization and adaptability to varying mission requirements.
The materials used, typically high-strength polymers or reinforced carbon fiber, offer a balance between durability and weight, minimizing neck strain during prolonged use.
You must understand that the attachment systems – often featuring rail interfaces or shrouded mounts – are designed for quick disengagement and reattachment, maximizing operational efficiency and flexibility in dynamic environments.
Choosing Communication Devices
When selecting communication devices for your ballistic helmet, you must assess their compatibility with your specific helmet model.
Consider the device’s weight, as it directly impacts your gear’s overall balance and comfort during operations.
Analyze the trade-offs between device functionality and the additional burden to ensure optimal performance.
Compatibility With Helmets
Before selecting communication devices for your ballistic helmet, ensure they’re compatible with your helmet’s make and model. The interface between the helmet and the device is critical for functionality and reliability. You must consider the mounting systems and the available real estate on your helmet for attachments.
- Mounting Systems:
- Picatinny rails
- ARC rails
- M-LOK slots
- Communication Device Criteria:
- Weight and balance
- Ease of integration
Each mounting option presents unique advantages. Picatinny rails offer a standardized attachment method, while ARC rails provide a sleeker profile with secure mounting. M-LOK slots are known for their versatility in positioning accessories.
Evaluate the weight distribution of the communication devices, as this impacts comfort during prolonged use. Integration ease is paramount to ensure seamless operation with your existing helmet setup.
Device Weight Considerations
As you evaluate communication devices for your ballistic helmet, consider that even a few ounces can significantly affect your comfort and neck strain over extended periods. It’s crucial to balance the device’s functionality with its weight, ensuring you don’t compromise your agility and endurance.
| Device Type | Weight Range (oz) |
| Tactical Headsets | 8 – 12 |
| Radio Adapters | 4 – 6 |
| Microphone Booms | 2 – 4 |
| PTT Assemblies | 3 – 5 |
Select lightweight materials that provide the durability and performance you require. Analyze the weight distribution and how it integrates with your helmet’s center of gravity. A meticulous approach to weight management can lead to enhanced operational efficiency and reduced physical burden during prolonged missions.
Mounting Communication Gear
To effectively rig your ballistic helmet with communication gear, you’ll need to understand the various mounting systems available for radios and headsets. The choice of mounting system is critical for operational efficiency and comfort. Here’s a breakdown of key aspects:
- Rail Adapter Systems
- Provide a secure platform for attaching headsets directly to helmet rails.
- Allow for easy integration with other head-borne equipment.
- Helmet Cutouts and Velcro Panels
- Facilitate cable management and reduce snagging risks.
- Enable attachment of PTT (Push-To-Talk) devices in accessible locations.
Ensure that the system you select is compatible with your helmet’s design and the specific communication devices you intend to use. This precision in setup is essential for maintaining clear lines of communication while in the field.
Camera Attachment Options
While you’re setting up your communication gear, you’ll also want to consider the various options for mounting cameras to your ballistic helmet to ensure you’re capturing vital visual information without hindrance. Opt for mounts that offer stability and are compatible with your helmet’s design.
The NVG (Night Vision Goggle) shroud, typically at the front of the helmet, provides a central mounting point but may require an adapter for camera attachment. Side rails are an alternative, allowing lateral positioning which is ideal for unobstructed peripheral vision.
Ensure the mount’s material is durable, like high-strength polymer or machined aluminum, to withstand operational stress. Additionally, verify that the camera’s weight doesn’t unbalance your helmet, maintaining an even distribution to prevent neck strain during prolonged use.
Installing Camera Systems
You’ll need a compatible mounting system to securely attach your camera to the ballistic helmet. Ensure the mount’s compatibility with your helmet’s design—different helmets may require specific adapters or mounting plates. Here’s a precise approach:
- Align the mounting system
- Check for proper fitment on the helmet’s surface
- Adjust the mount to align with the helmet’s curvature
- Secure the camera
- Fasten the camera onto the mount using provided screws or clips
- Verify the camera is stable and doesn’t wobble
Once installed, test the camera’s field of view to ensure optimal coverage. If necessary, make fine adjustments. Your camera should now be ready for operation, with minimal impact on helmet balance and user comfort.
Integration Best Practices
You must ensure that all communication and camera equipment attached to your ballistic helmet is securely fastened to avoid any detachment during critical operations.
Analyze the spatial configuration of your helmet to minimize the risk of equipment interference, which can compromise functionality and safety.
It’s crucial to adhere to manufacturer guidelines for optimal integration, balancing the rig’s robustness with the operator’s agility and comfort.
Secure Attachment Methods
In rigging your ballistic helmet with communication and camera gear, it’s essential to prioritize methods that ensure a secure and reliable attachment. This involves using hardware and integration techniques that withstand dynamic conditions without compromising helmet integrity or function. Precision and attention to detail are critical.
Consider the following secure attachment methods:
- Rail Systems
- Utilize proprietary or standardized rails for modular attachment.
- Ensure locks and release mechanisms are robust and easily operable.
- Hook and Loop Panels
- Affix devices using industrial-strength adhesive-backed hook and loop.
- Check for compatibility with helmet material to prevent degradation.
Adhere to the manufacturer’s guidelines for load distribution to maintain the helmet’s protective performance while ensuring operational efficiency and safety.
Minimizing Equipment Interference
To ensure your helmet’s functionality isn’t compromised, carefully integrate communication and camera equipment to minimize interference with its protective capabilities. When selecting gear, prioritize components with slim profiles and flexible mountings. Analyze the helmet’s surface to determine optimal placement that doesn’t impede critical coverage areas or disrupt the weight distribution.
Use modular systems that allow for easy removal or reconfiguration, maintaining the helmet’s integrity during dynamic operations. Examine cable routing to prevent snagging hazards and ensure there’s no undue strain on connectors, which could lead to equipment failure.
Always test your setup under realistic conditions, assessing for any potential conflicts with your helmet’s primary function. Adhering to these best practices ensures seamless integration while preserving essential ballistic protection.
Maintenance and Troubleshooting
Regular maintenance of your ballistic helmet’s communication and camera gear ensures optimal performance and longevity. This involves systematic inspections and cleaning, alongside prompt troubleshooting of any issues that arise. Here are key aspects to focus on:
- Inspection
- Check for physical damage to wiring and casings.
- Ensure all connections are secure and free of corrosion.
- Cleaning
- Gently remove debris and dust from device surfaces.
- Use appropriate solvents for cleaning contacts without causing damage.
When troubleshooting, methodically test each component. If a headset malfunctions, verify the integrity of its connection points before considering a replacement. Similarly, if camera feed quality degrades, assess lens cleanliness and software settings before proceeding with hardware diagnostics.
Adherence to these protocols guarantees that your equipment remains reliable in critical situations.
Some Helmet Accessories Supplied by Steele Industries
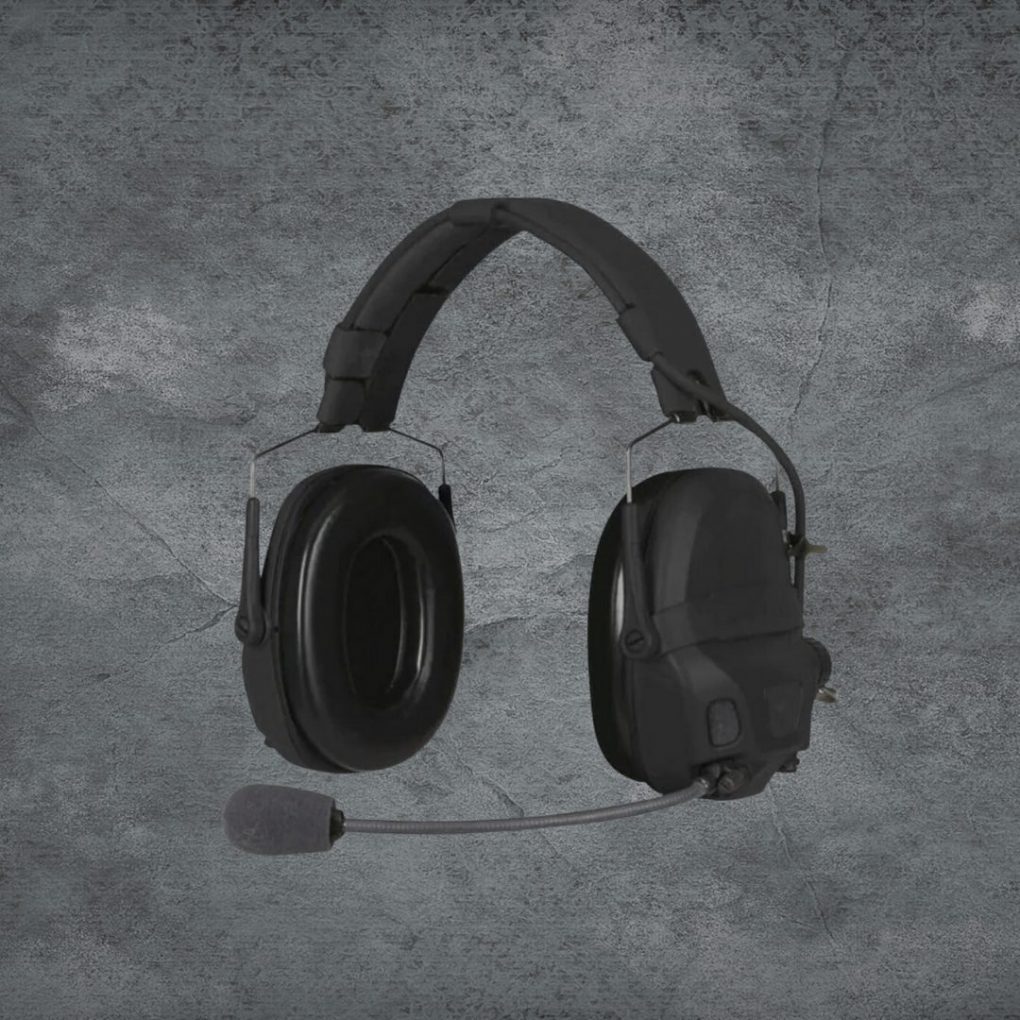
Ops-Core Amp Headset

The Ops-Core AMP Communication Headset is an advanced tactical communications solution designed to provide superior audio clarity, noise reduction, and mission flexibility. It features a modular platform that adapts to a variety of operational scenarios and integrates seamlessly with helmets and other gear. With 3D Hear-Through Technology and an array of easily accessible controls, the headset enhances situational awareness while protecting users’ hearing. The AMP Headset is built to withstand the rigors of the battlefield while maintaining comfort for extended use. Its compatibility with Ops-Core’s helmet systems and the ability to configure for either headband or helmet mounting makes it a versatile and indispensable tool for military and law enforcement professionals.
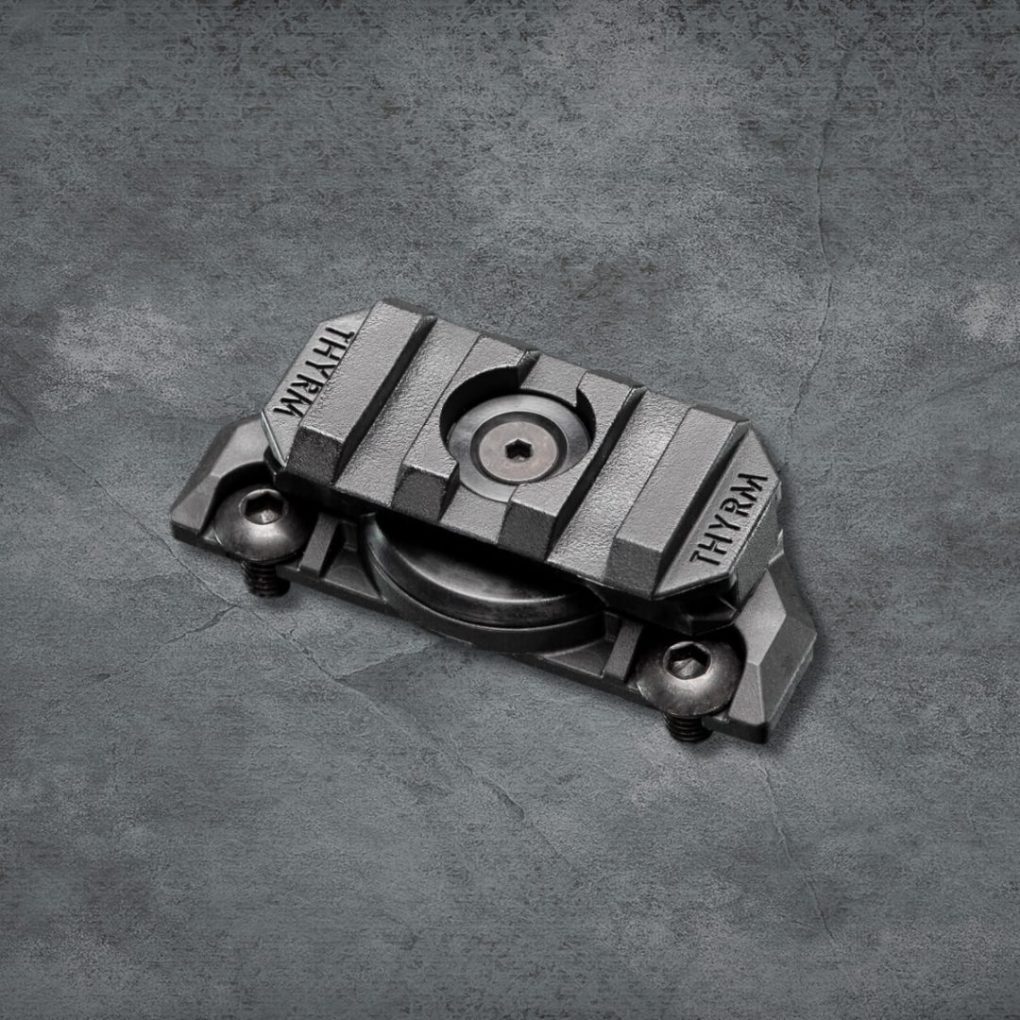
Thyrm VariArc Helmet Mount (Team Wendy)

The VariArc Helmet Mount for Team Wendy helmets offers a robust and versatile mounting solution that provides a stable platform for attaching lights and other gear to your helmet. Designed with a unique locking function that allows quick and secure positioning, the VariArc has multiple indexed points of articulation to optimize the placement of accessories. It boasts a durable construction that’s engineered to match the quality and design of Team Wendy helmets, ensuring reliability in the field. Easy to install and compatible with the Team Wendy rail system, the VariArc Helmet Mount is an excellent choice for tactical operators who need customizable and accessible light placement options during demanding operational conditions.
Frequently Asked Questions
How Does the Weight Distribution of Communication and Camera Attachments Affect Neck Fatigue During Extended Wear?
The weight distribution of added gear, like cameras and comms devices, can increase neck fatigue over time. You’ll feel more strain with uneven or front-heavy rigs during prolonged periods. Balance is key to comfort.
Are There Any Wireless Communication Options That Reduce the Risk of Snagging in Close-Quarters Environments?
Yes, you’ll find several wireless communication devices that offer snag-free operation, enhancing your mobility and safety in tight spaces. These systems are designed to integrate seamlessly, avoiding external wires that can catch or tangle.
What Are the Potential Electromagnetic Interference (Emi) Issues When Installing Multiple Electronic Devices on a Ballistic Helmet, and How Can They Be Mitigated?
You’ll face potential EMI issues by creating signal crosstalk and reduced device performance. Mitigate these by spacing electronics apart and using shielded cables or EMI suppression materials to prevent interference.
Can Helmet-Mounted Cameras Be Used in Conjunction With Night Vision Devices Without Compromising the Functionality of Either System?
Yes, you can use helmet-mounted cameras with night vision devices if they’re properly integrated to avoid interference, ensuring both systems function optimally without compromising each other’s performance.
What Are the Legal and Privacy Considerations to Be Aware of When Recording With Helmet-Mounted Cameras During Operations?
You must consider consent laws and individuals’ privacy rights when recording with helmet-mounted cameras. Always check local regulations and ensure compliance with legal standards to avoid violations during operational use.
Conclusion
You’ve navigated the complexities of rigging ballistic helmets with communication devices and cameras. Remember, selecting the right gear is critical; ensure it’s combat-proven and compatible.
Installation should be methodical, securing devices without compromising helmet integrity. Prioritize seamless integration for optimal functionality and ease of use.
Keep up with maintenance—regular checks and troubleshooting are vital. Your helmet’s rigging is your lifeline in the field; treat it with the technical precision it demands.


